-
3-minute read
-
24th October 2016
6 Essential Formatting Tips for Academic Papers
Writing a good paper is one thing; making it look professional is another thing entirely.
Yet the presentation of your work can affect its clarity, as well as creating a good (or bad) first impression for your reader. As such, formatting is essential.
But Microsoft Word is a bloated, unwieldy beast of a word processor, with a huge array of options. Luckily, then, we’ve prepared this quick guide to the basics of formatting an academic document.
1. Headings and Styles
The “Styles” in Microsoft Word are preformatted text styles that you can customize and use in your work, thereby ensuring formatting is applied consistently throughout a document.

Perhaps the most important are the “Heading” styles, as these also let you automatically generate a dynamic table of contents.
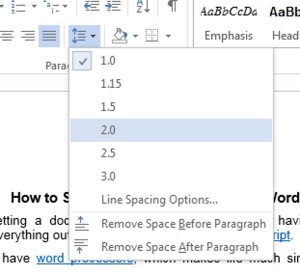
2. Give Yourself Space
Tightly packed text is difficult to read, so make sure to use paragraph and line spacing effectively.
Paragraph spacing refers to the gap between paragraphs in your document that appears when you hit return. Line spacing is the space between each line within a paragraph (many schools require papers to be double spaced).
Line and paragraph spacing can both be adjusted via the “Paragraph” section of the “Home” tab.
3. What’s Your Alignment?
As much as we’d love this to be about D&D, we’re actually talking about text alignment (i.e. the way text is presented in a document).
Find this useful?
Subscribe to our newsletter and get writing tips from our editors straight to your inbox.
Subscribe to Beyond the Margins and get your monthly fix of editorial strategy, workflow tips, and real-world examples from content leaders.
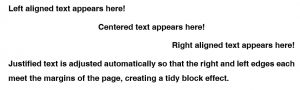
Generally, “Justified” looks neatest for the main text in a paper since it creates neat blocks, but you might want to use “Centered” or “Left” for headings. As with line and paragraph spacing, text alignment can be adjusted using the “Paragraph” options.
4. Marginal Interests
If you check your college style guide, you might find that it specifies a size for the margins in your document. This can be adjusted via the “Margins” button on the “Page Layout” tab.
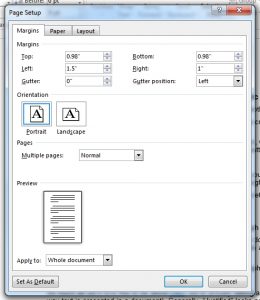
If your style guide doesn’t offer any advice, we suggest around 1.5” for the left margin and 1” for the right margin. This looks tidy while giving plenty of space for feedback.
5. We’ve Got Your Number
Ever printed a 20,000 word paper and then dropped the entire thing on the floor? If so, you’ll know how important page numbers can be for keeping everything in order.
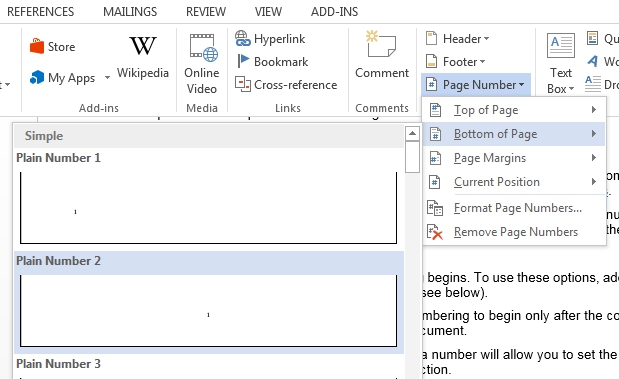
Basic page numbers can be added quickly via the “Page Number” menu in the “Insert” tab. For longer documents, you might also want to check out some of the advanced options.
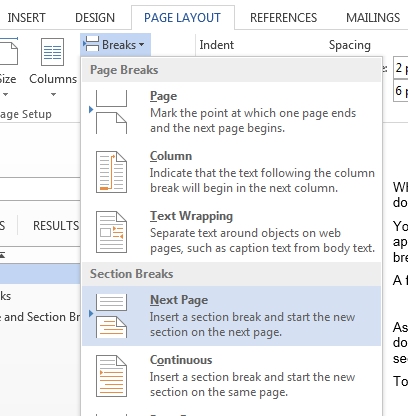
6. Time for a Break
Not a rest, silly goose. Page and section breaks. These let you start a new chapter on a new page, ensuring your document looks tidy whatever changes you make while editing.
A page break simply begins on a new page, whereas a section break can also be used to apply different styles of formatting to different parts of a document. Both can be added via the “Breaks” menu on the “Page Layout” tab in Microsoft Word.