-
3-minute read
-
24th September 2018
Microsoft Word: How to Indent Text in a Document
Formatting text in MS Word is both pleasingly simple and annoyingly complicated. Take text indentation, for example. The basics are very easy to grasp. But there are many extra options that you may miss if you’re not already a confident Microsoft Word user. To help out, then, we’ve prepared this complete guide on how to indent text in a document.
The Tab Key
One simple way to indent text is to place the cursor at the start of a paragraph and hit the tab key on your keyboard. In Microsoft Word, this adds a 0.5” (1.27cm) indent at the left margin. It also automatically formats the text so that subsequent paragraphs have a first-line indent.
If all you want to do is begin each paragraph with a half-inch indent, this is fine. But for more control over text indentation in your document, read on.
How to Indent Text
You can find the basic indentation options in Microsoft Word on the main ribbon. This includes the Paragraph section of the Home tab, where you will find Increase Indent and Decrease Indent buttons.
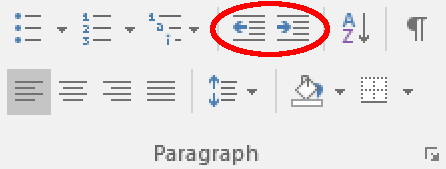
The Increase Indent button adds a 0.5” (1.27cm) indent at the left margin for the entire paragraph (not just the first line). The Decrease Indent button, meanwhile, does the exact opposite.
Alternatively, go to Layout > Paragraph on the ribbon and adjust the values in the left and right indent boxes as required. This has the added bonus of letting you indent text by a custom amount.
Find this useful?
Subscribe to our newsletter and get writing tips from our editors straight to your inbox.
Subscribe to Beyond the Margins and get your monthly fix of editorial strategy, workflow tips, and real-world examples from content leaders.

Special Indentations
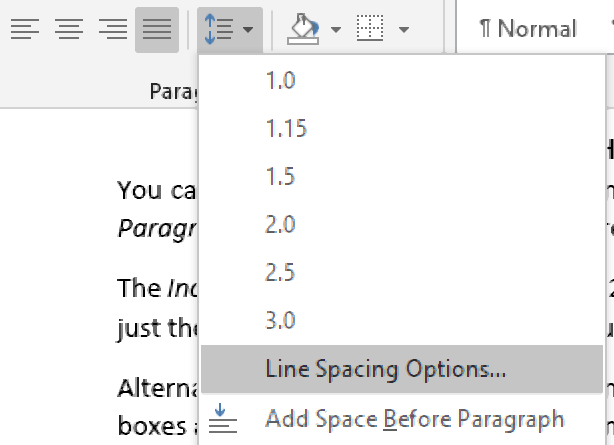
For even more control over the indentation in your document, you can open the main Paragraph menu. This can be accessed by going to Home > Paragraph, clicking the Line and Paragraph Spacing button, and then selecting Line Spacing Options… from the dropdown menu.
In the new window, you will find an Indentation section. The left and right indent options here work the same as in the Layout tab on the ribbon.
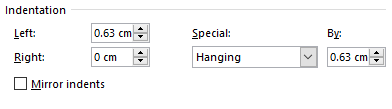
The other settings here can be used to add special indentations to your document. These include:
- First line – This option indents the first line of each paragraph to a custom value. Typically, this type of indent would be used as an alternative to paragraph spacing.
- Hanging – This will indent each line after the first in a paragraph. The most common use for this is to add a hanging indent in a reference list (e.g., as required in APA referencing).
- Mirror indents – Clicking this will change the left and right indent options to say Inside and Outside This will mean that indents are “mirrored” on odd and even pages, which helps ensure consistent formatting when printing something in a book format.
To use these options, simply select the text you want to format with the cursor, open the paragraph menu, choose the type and size of indent you want to apply, and click OK to change the indentation for the selected text.