-
3-minute read
-
19th October 2021
How to Add Chapter Numbers to Captions in Microsoft Word
If you’re working on a document with multiple chapters and that includes figures, tables, or equations, you might want to add the relevant chapter number to the caption for each object. In this guide, we will take you through the steps for adding chapter numbers to captions in Microsoft Word.
Apply a Heading Style to Your Chapter Headings
It is important that you use a unique heading style for your chapter headings. For example, if you use Heading 1 as the style for chapter headings, you should not use Heading 1 for any other text in the document. If you do, Word will identify that text as another chapter heading, and things will get very confusing!
To apply a heading style in Microsoft Word:
- Select the relevant text with the cursor.
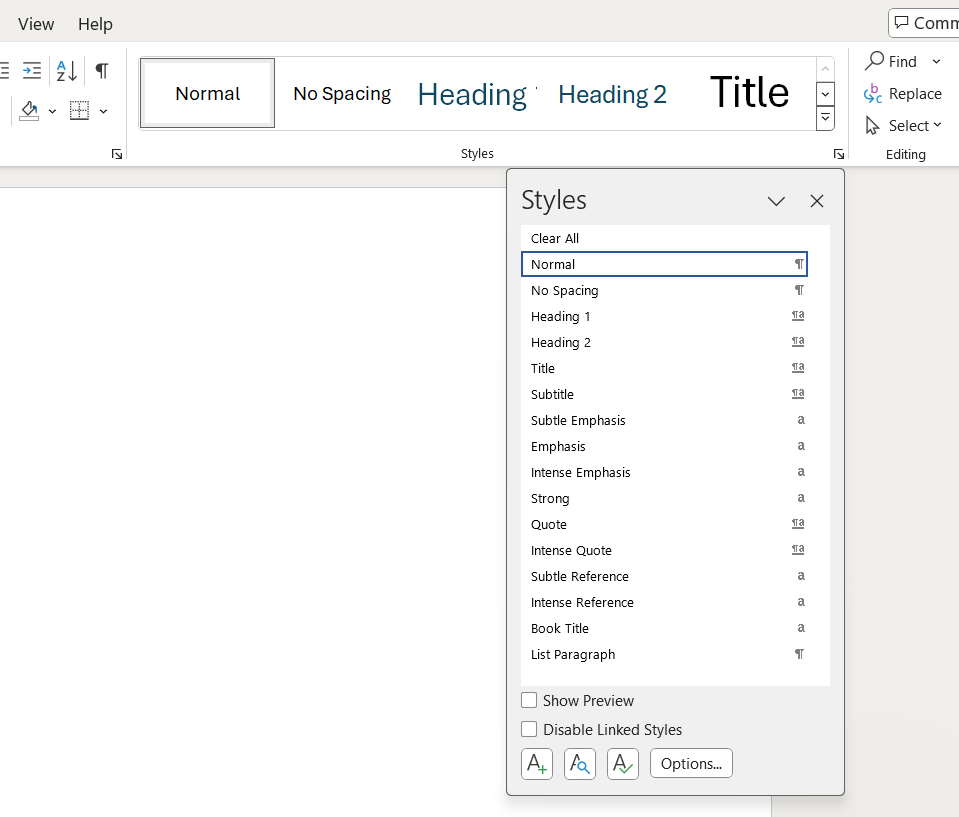
- Go to the Styles gallery in the Home tab.
- Select the heading style you wish to use.

When you have repeated these steps for each of your chapter headings, the next stage is to add numbering to the chapter headings.
Apply Numbering to Chapter Headings
To apply automatic numbering to your chapter headings:
- Select the first chapter heading.
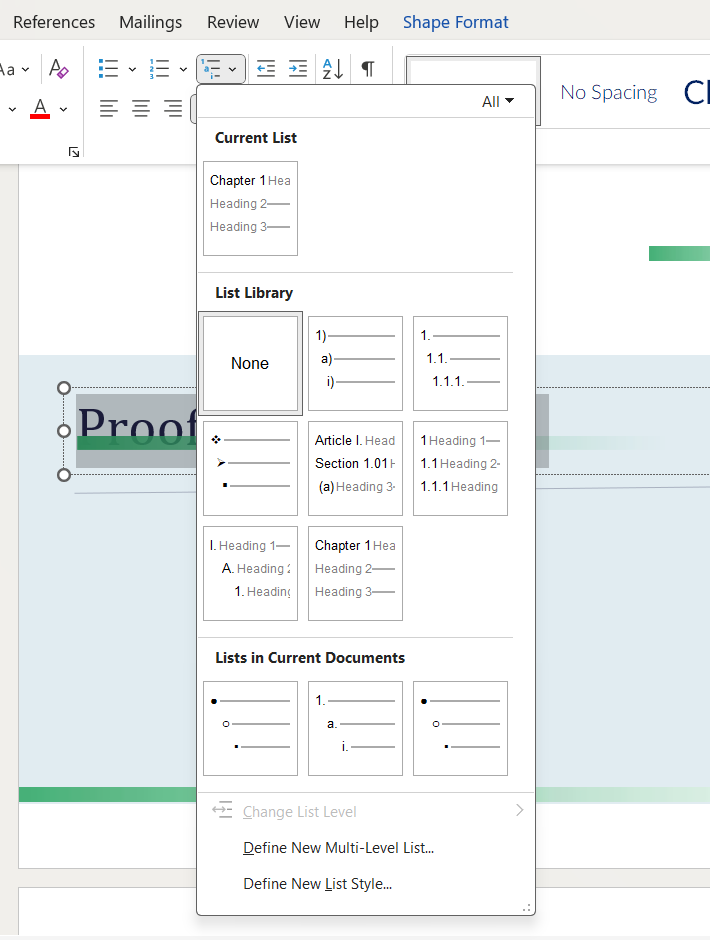
- In the Home tab, click the arrow next to Multilevel List.
- Select an appropriate style from the List Library. Choose one that includes Chapter 1 and the heading style you have used. You may have to click Define new multilevel list if there isn’t one that matches your chosen heading style.

You only need to follow these steps for the first chapter heading as the numbering should automatically be applied to every heading in the same style.
Find this useful?
Subscribe to our newsletter and get writing tips from our editors straight to your inbox.
Subscribe to Beyond the Margins and get your monthly fix of editorial strategy, workflow tips, and real-world examples from content leaders.
“Chapter 1,” “Chapter 2,” etc., should now appear in front of each heading throughout the document. This means you are ready to add your captions.
How to Add Captions with Chapter Numbers
Follow these steps to add captions with chapter numbers in your document:
- Select the object you wish to add a caption to in the document.
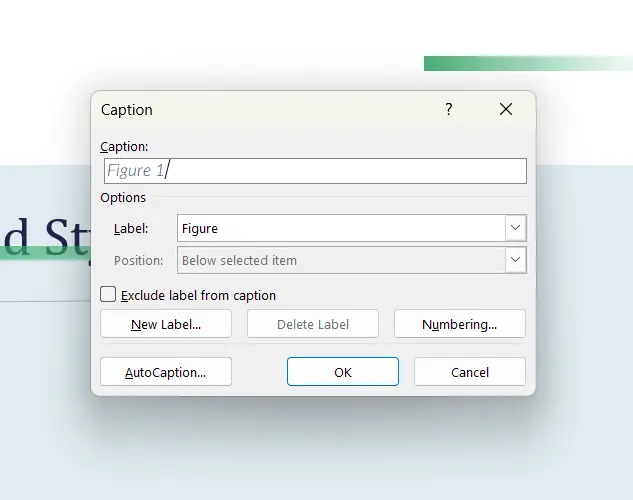
- Go to the References tab and click Insert Caption (or right-click the item you’re adding a caption to and select Insert Caption from the contextual menu). This will open the Caption dialog box.
- Select a Label type from the menu (i.e., Figure, Table, or Equation). If your required label isn’t listed, you can create a new one by clicking New Label.
- In the Caption field, add any text that you want to appear after the label.

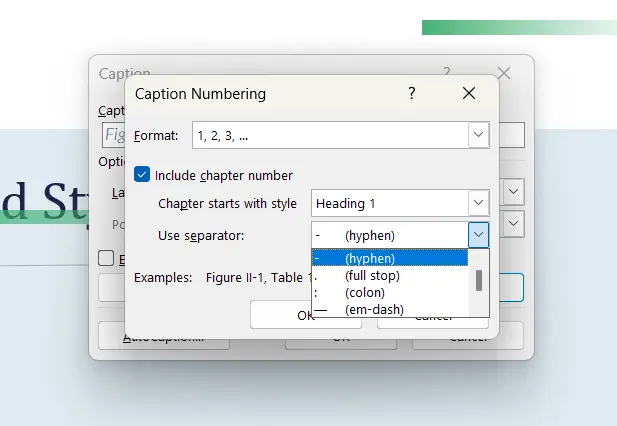
- Next, click Numbering to open the caption numbering dialog box.
- Check the Include chapter number box.
- Select your chapter heading style from the dropdown list next to Chapter starts with style, and choose a separator from the list (i.e., the punctuation mark that will separate the chapter number from the caption number).

- Click OK on both dialog boxes to apply your caption.
Hey, presto! Your caption should now appear complete with the appropriate chapter number. All you need to do is repeat steps 1–8 for each object in the document.
Expert Proofreading
Hopefully, it’s now clear how to add chapter numbers to captions in Microsoft Word. Our eagle-eyed proofreaders are adept at spotting obvious errors, like glaring typos, and less obvious ones, like inconsistent chapter numbering. Why not send us a free trial document today to see what we can do?


