


Adding page numbers to a Microsoft Word document is a fundamental element of formatting. This is particularly important in a longer piece of work, like a dissertation, since it prevents the pages from getting mixed up and helps your reader navigate the document.
What many people don’t realize, however, is that Microsoft Word offers customized formatting options for page numbers, allowing you to apply different styles to different parts of a document.
In today’s blog post, we run through how you can use page numbers to make your work look tidy and professional.
Adding Page Numbers to a Document
The basic process of adding page numbers to a document is simple. All you need to do is:
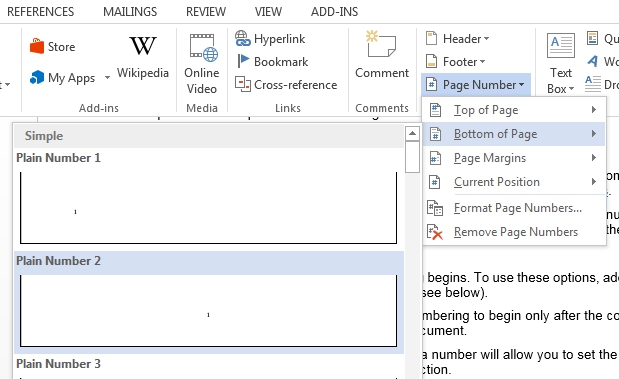
- Go to the “Insert” tab and click “Page Number” in the “Header & Footer” section
- In the dropdown menu, select where you want your page numbers to appear (header, footer or margins)
- Finally, select the alignment for your page numbers (left, right or center)

This will add page numbers throughout your document, making it easier to navigate between sections.
Formatting Page Numbers
The default page number style in Microsoft Word can be adjusted using the “Format Page Numbers” option in the dropdown menu. The pop-up menu that appears when you click on this gives you two main options:
- Number Format
This allows you to control the style of numbering you apply in your document. The default is Arabic numerals, but you can use lettering or Roman numerals instead if you prefer.
Find this useful?
Subscribe to our newsletter and get writing tips from our editors straight to your inbox.
You can also add the chapter number to your page numbering by selecting “Include Chapter Number,” but this only works if you’ve applied appropriate “Heading” styles in your document.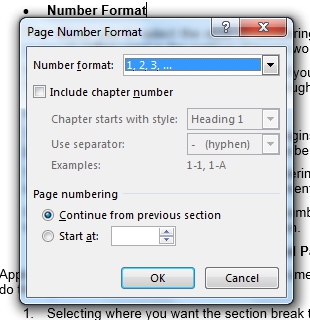

- Page Numbering
These options allow you to control the number at which your page numbering starts. Usually this will default to “1,” starting at the first page of your document.
Sections Breaks and Page Numbering
Microsoft Word can also apply different styles of page numbering in different parts of your document. This can be handy if, for instance, you want the page numbers to begin only after the cover page, or if you wanted to use Roman numerals for pages preceding the introduction.
To do this, however, you’ll need to add section breaks to your document:
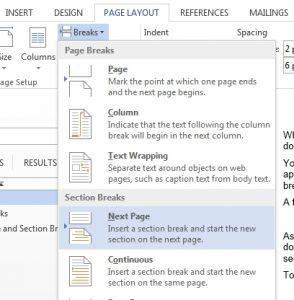
- Select where you want a section break to appear
- Go to “Page Layout” and click “Breaks”
- Select “Next Page” under “Section Breaks” in the dropdown menu

To apply different page number styles before and after the break:
- Go to “Insert” and find the “Header & Footer” section
- Select “Edit” under either “Header” or “Footer”
- Select the header/footer where you want to apply a particular numbering style
- In the “Design” tab, deselect “Link to Previous”
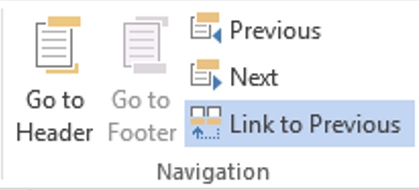

Once this is done, changing the formatting style of the page numbers in one part of the document will leave preceding sections unchanged.