- 2-minute read
- 2nd March 2021
How to Change the Paper Size in Microsoft Word
Did you know that Microsoft Word lets you change your paper size to suit any document you are working on? Find out how to do this with our guide below.
Changing the Paper Size of a Whole Document
To change the paper size of your document in Microsoft Word:
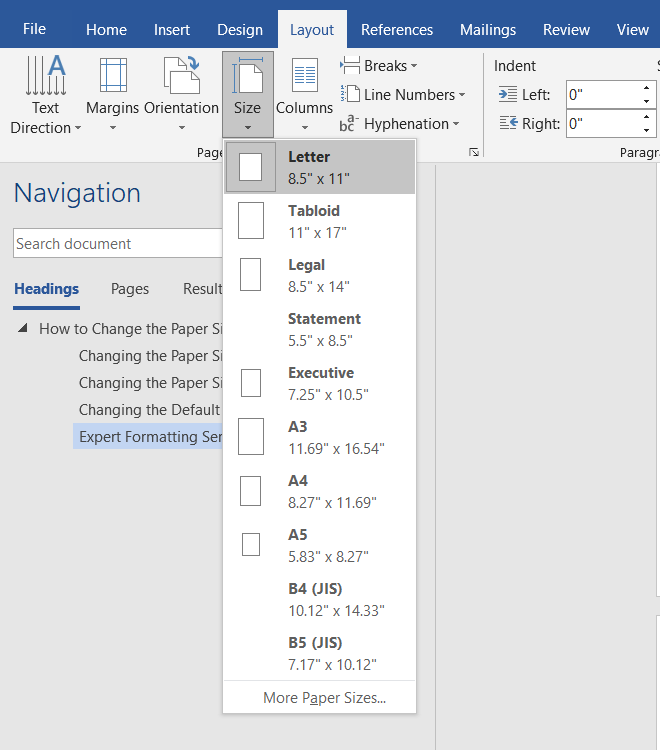
- On the main ribbon, go to Layout and click Size.
- Select the size you want from the drop-down menu.
Your chosen paper size is now applied to the whole document. All you need to do then is remember to use the correct paper size if you’re printing it.

Changing the Paper Size of Part of a Document
If you need to use more than one paper size in a single Word document, you can:
- Place the cursor where you want the new paper size to start.
- Go to Layout > Size and select More Paper Sizes at the bottom.
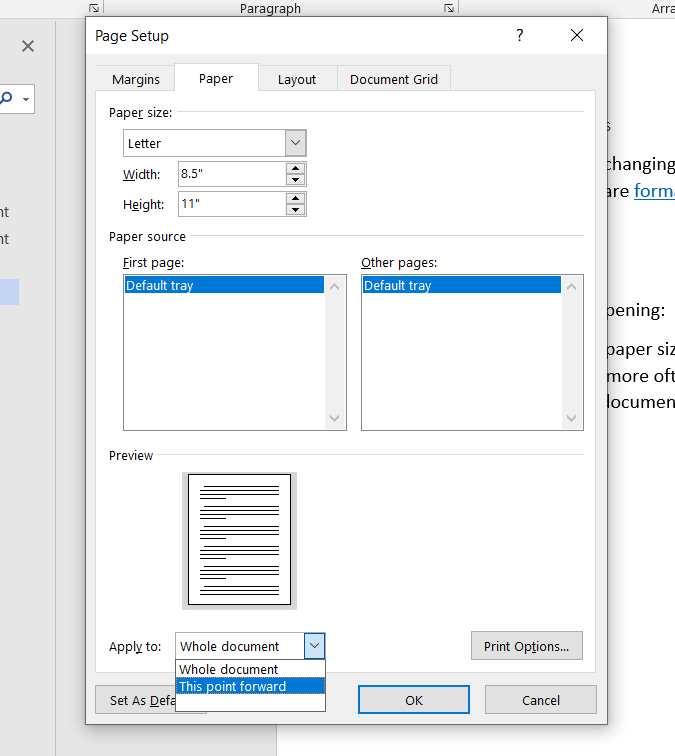
- On the Paper tab of the dialog box, select a size (or, for a custom paper size, enter a width and height in the fields below the dropdown menu).
- In the Apply to section, select This point forward and click OK.
This will add a section break just before the point where you placed your cursor, with the next page using the new paper size. You can also add section breaks manually and then change the paper size via the Size menu on the main ribbon.
Find this useful?
Subscribe to our newsletter and get writing tips from our editors straight to your inbox.

Changing the Default Paper Size
In the US, Word’s default paper size is Letter (8.5 x 11 inches / 21.59 x 27.94 cm). If you use a different paper size more, though, you can change this:
- Go to Layout > Size > More Paper Sizes on the main ribbon.
- Select a paper size from the dropdown menu (or enter custom values).
- Click the Set As Default button at the bottom left of the dialog box.
- Click Yes to confirm the change.
From now on, the paper size will default to this new size when you open Word.
Expert Formatting Services
If you follow these steps, changing the paper size in Microsoft Word should be easy. For more help, though, our editors are formatting experts and on hand 24/7!


