If you regularly use Microsoft Word with a language that reads from right-to-left, you may find that the right-to-left format remains when you try to write in English. This is because the text direction defaults to right-to-left in versions of Microsoft Word sold in some regions.
Luckily, if you’re using a Windows computer, changing the direction of text is easy via the “left-to-right” command. Only the most recent versions of Word for Mac support this feature, so if you encounter this problem, the best option is to copy and paste the text into a new document.
Customizing the Quick Access Toolbar
The first thing you need to do is add the “left-to-right” command to the Quick Access Toolbar. To do this, click the arrow next to the “Redo” button and choose “More Commands” from the dropdown list.

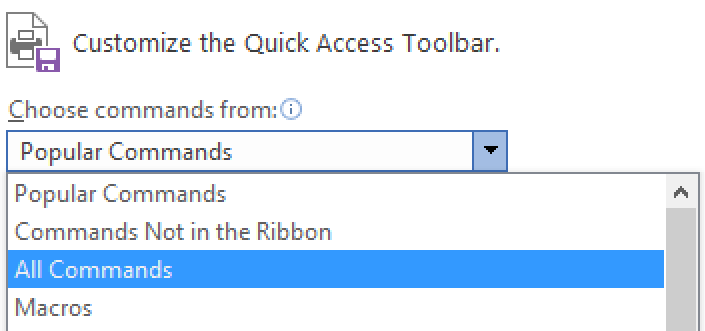
On the next screen, you have the option to choose commands to add to the toolbar. If you can’t see the “left-to-right” command, chose “All Commands” from the top menu.

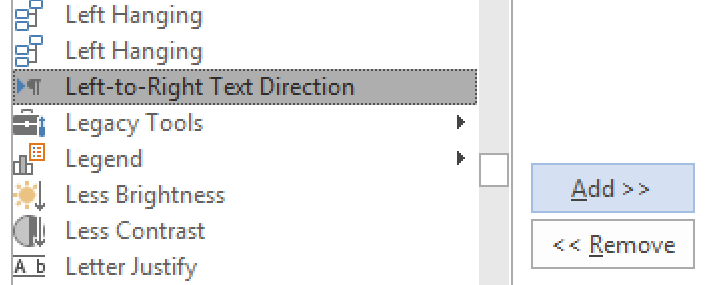
Next, scroll down and choose “Left-to-Right Text Direction.” The name of the command here may depend on the version of Word you’re using. In Word 2010, this command is called “Ltr run,” while Word 2003 lists it as “Ltr para.”
Find this useful?
Subscribe to our newsletter and get writing tips from our editors straight to your inbox.

Now the button will be displayed on the toolbar (you can use a similar process to add it to the main ribbon if you right click on the ribbon and select “Customize the Ribbon”).

Now select the text that is showing right-to-left, click the button, and it should switch to left-to-right. Repeat this last step anywhere in your document, including footnotes and comment boxes, where the text direction displays from right-to-left.
It’s also worth noting that you can select the “Right-to-Left Text Direction” command using the same method. This is useful if you need to switch back to the original format at any point.
Formatting from Proofed
If you would like to get your paper formatted perfectly, send it to the professionals at Proofed!


