- 4-minute read
- 24th April 2019
Adding Images in Microsoft Word
From company logos to detailed scientific illustrations, there are many reasons to add an image to a Microsoft Word document. But how does this work? And how can you ensure your finished document looks professional? Check out our guide below for a few tips.
Adding Images in Microsoft Word
You have three main options for adding images in Microsoft Word:
- Adding an image from your computer
- Adding an image from the internet
- Using the “Shapes” and “SmartArt” available via MS Word
You can access all these options by going to Insert > Illustrations on the main ribbon. This tab is also where you can find options for adding charts and tables to your document.

1. Adding an Image from Your Computer
If you are adding images from your own computer:
- Place the cursor where you want to add a picture
- Go to Insert > Illustrations
- Click Pictures to open a new window
- Find and select the image you want to use on your computer
- Click Insert
This will add the picture (full size) in the place selected. You can also add an image from your computer by dragging the thumbnail into the document.
2. Adding an Image from the Internet
This option lets you import an image directly from the internet. To do so:
Find this useful?
Subscribe to our newsletter and get writing tips from our editors straight to your inbox.
- Select where the image should go with the cursor
- Go to Insert > Illustrations
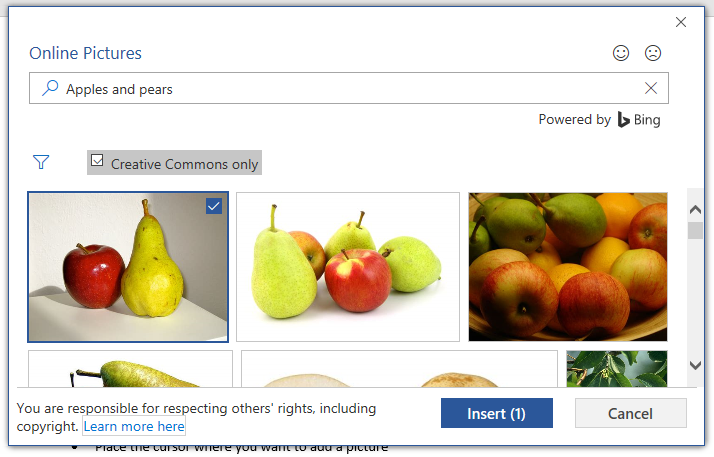
- Click Online Pictures
- Search for a picture using Bing Image Search (keep Creative Commons Only selected if you will be using the image for commercial purposes)
- Select the image(s) you want to use and click Insert

This will add the selected image to your document. It will even add a makeshift caption, including the license for the picture. However, make sure you’re familiar with the rules about using copyrighted and Creative Commons images before you add other people’s pictures to your document.
3. Shapes and SmartArt
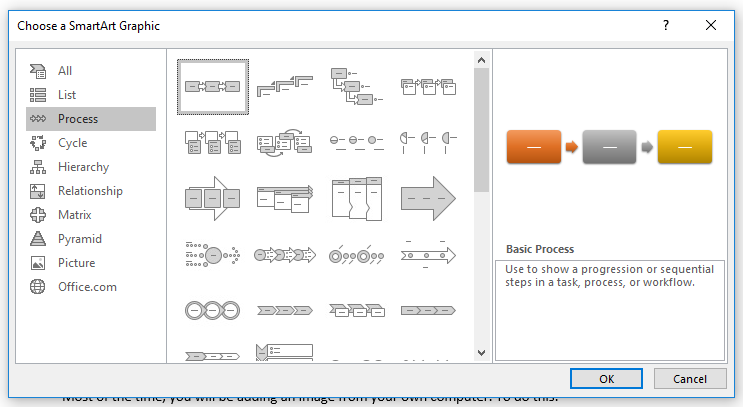
For simple images, such as flow charts or arrows, it may be easier to use the “Shapes” and “SmartArt” in Microsoft Word. These are pre-set graphics that you can add at the click of a button:
- The Shapes include arrows, boxes, speech bubbles and other basic geometrical shapes and graphics. You can access these by going to Insert > Illustrations > Shapes. You will then need to click and drag to set the dimensions of the shape selected.
- SmartArt uses predesigned combinations of the graphics from the “Shapes” menu. This allows you to add an entire flowchart in one go, for example, which you can then adjust as required.
These options offer a simple way to add visual elements to your document.

Formatting Images
We won’t go into all the image formatting options available in Microsoft Word here. However, there are two main factors to consider when adding images to a document:
- Image size and position – You can resize an image by clicking and dragging the circles at its edges. To move an image, moreover, you can click it and drag it around the document.
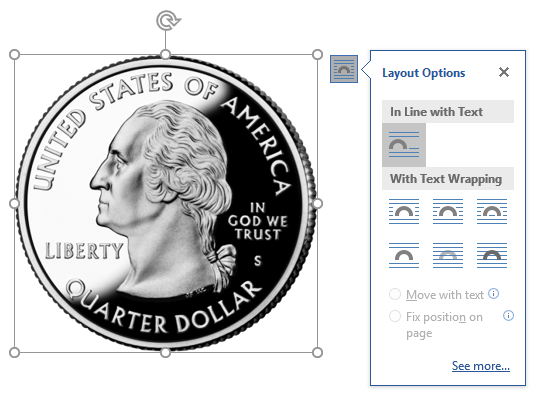
- Text wrapping – This controls how the image is positioned in relation to the text. You can access these settings by clicking the image and going to Format > Arrange > Wrap Text.

These options will help ensure the image looks tidy on the page. To remove an image from a document, meanwhile, simply select it and hit delete or backspace on your keyboard.


